> ## Documentation Index
> Fetch the complete documentation index at: https://docs.siflow.cn/llms.txt
> Use this file to discover all available pages before exploring further.
# 管理 Kubeconfig
## 生成 Kubeconfig
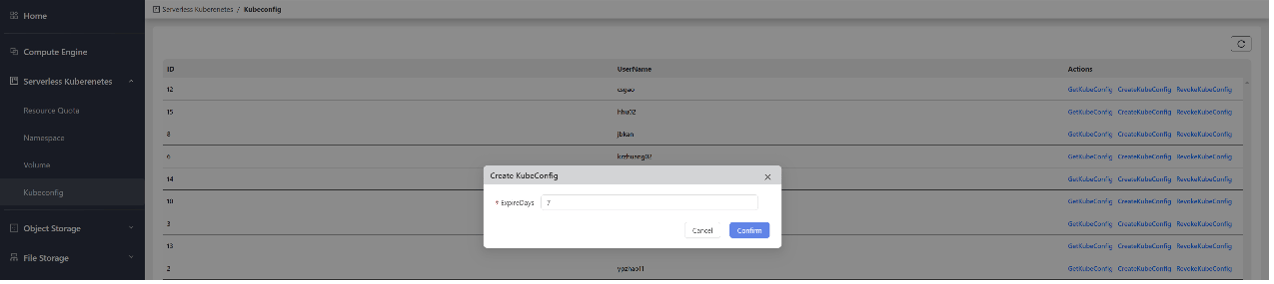
1. 进入 Serverless Kubernetes -> Kubeconfig 管理页面。
2. 在需要生成 kubeconfig 的用户条目右侧,点击 CreateKubeconfig。
3. 根据需要填写 kubeconfig 的有效期(天数),点击 Confirm 完成创建。如下图所示:
 ## 查看 Kubeconfig
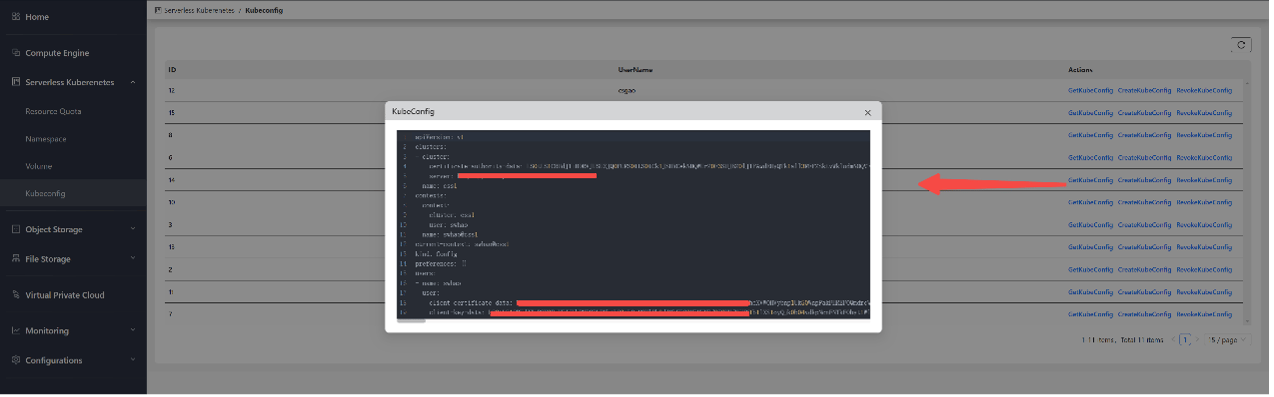
1. 进入 Serverless Kubernetes -> Kubeconfig 管理页面。
2. 在需要查看 kubeconfig 的用户条目右侧,点击 GetKubeconfig。如下图所示:
## 查看 Kubeconfig
1. 进入 Serverless Kubernetes -> Kubeconfig 管理页面。
2. 在需要查看 kubeconfig 的用户条目右侧,点击 GetKubeconfig。如下图所示:
 ## 使用 Kubeconfig
获取 kubeconfig 后,即可使用它管理该命名空间内的 k8s 资源。示例:
## 使用 Kubeconfig
获取 kubeconfig 后,即可使用它管理该命名空间内的 k8s 资源。示例:
 ## 删除 Kubeconfig
1. 进入 Serverless Kubernetes -> Kubeconfig 管理页面。
2. 在需要删除 kubeconfig 的用户条目右侧,点击 DeleteKubeconfig。如下图所示:
## 删除 Kubeconfig
1. 进入 Serverless Kubernetes -> Kubeconfig 管理页面。
2. 在需要删除 kubeconfig 的用户条目右侧,点击 DeleteKubeconfig。如下图所示:
