glm-5.2、DeepSeek-V4-Flash)和价格请参考 模型广场。
配置
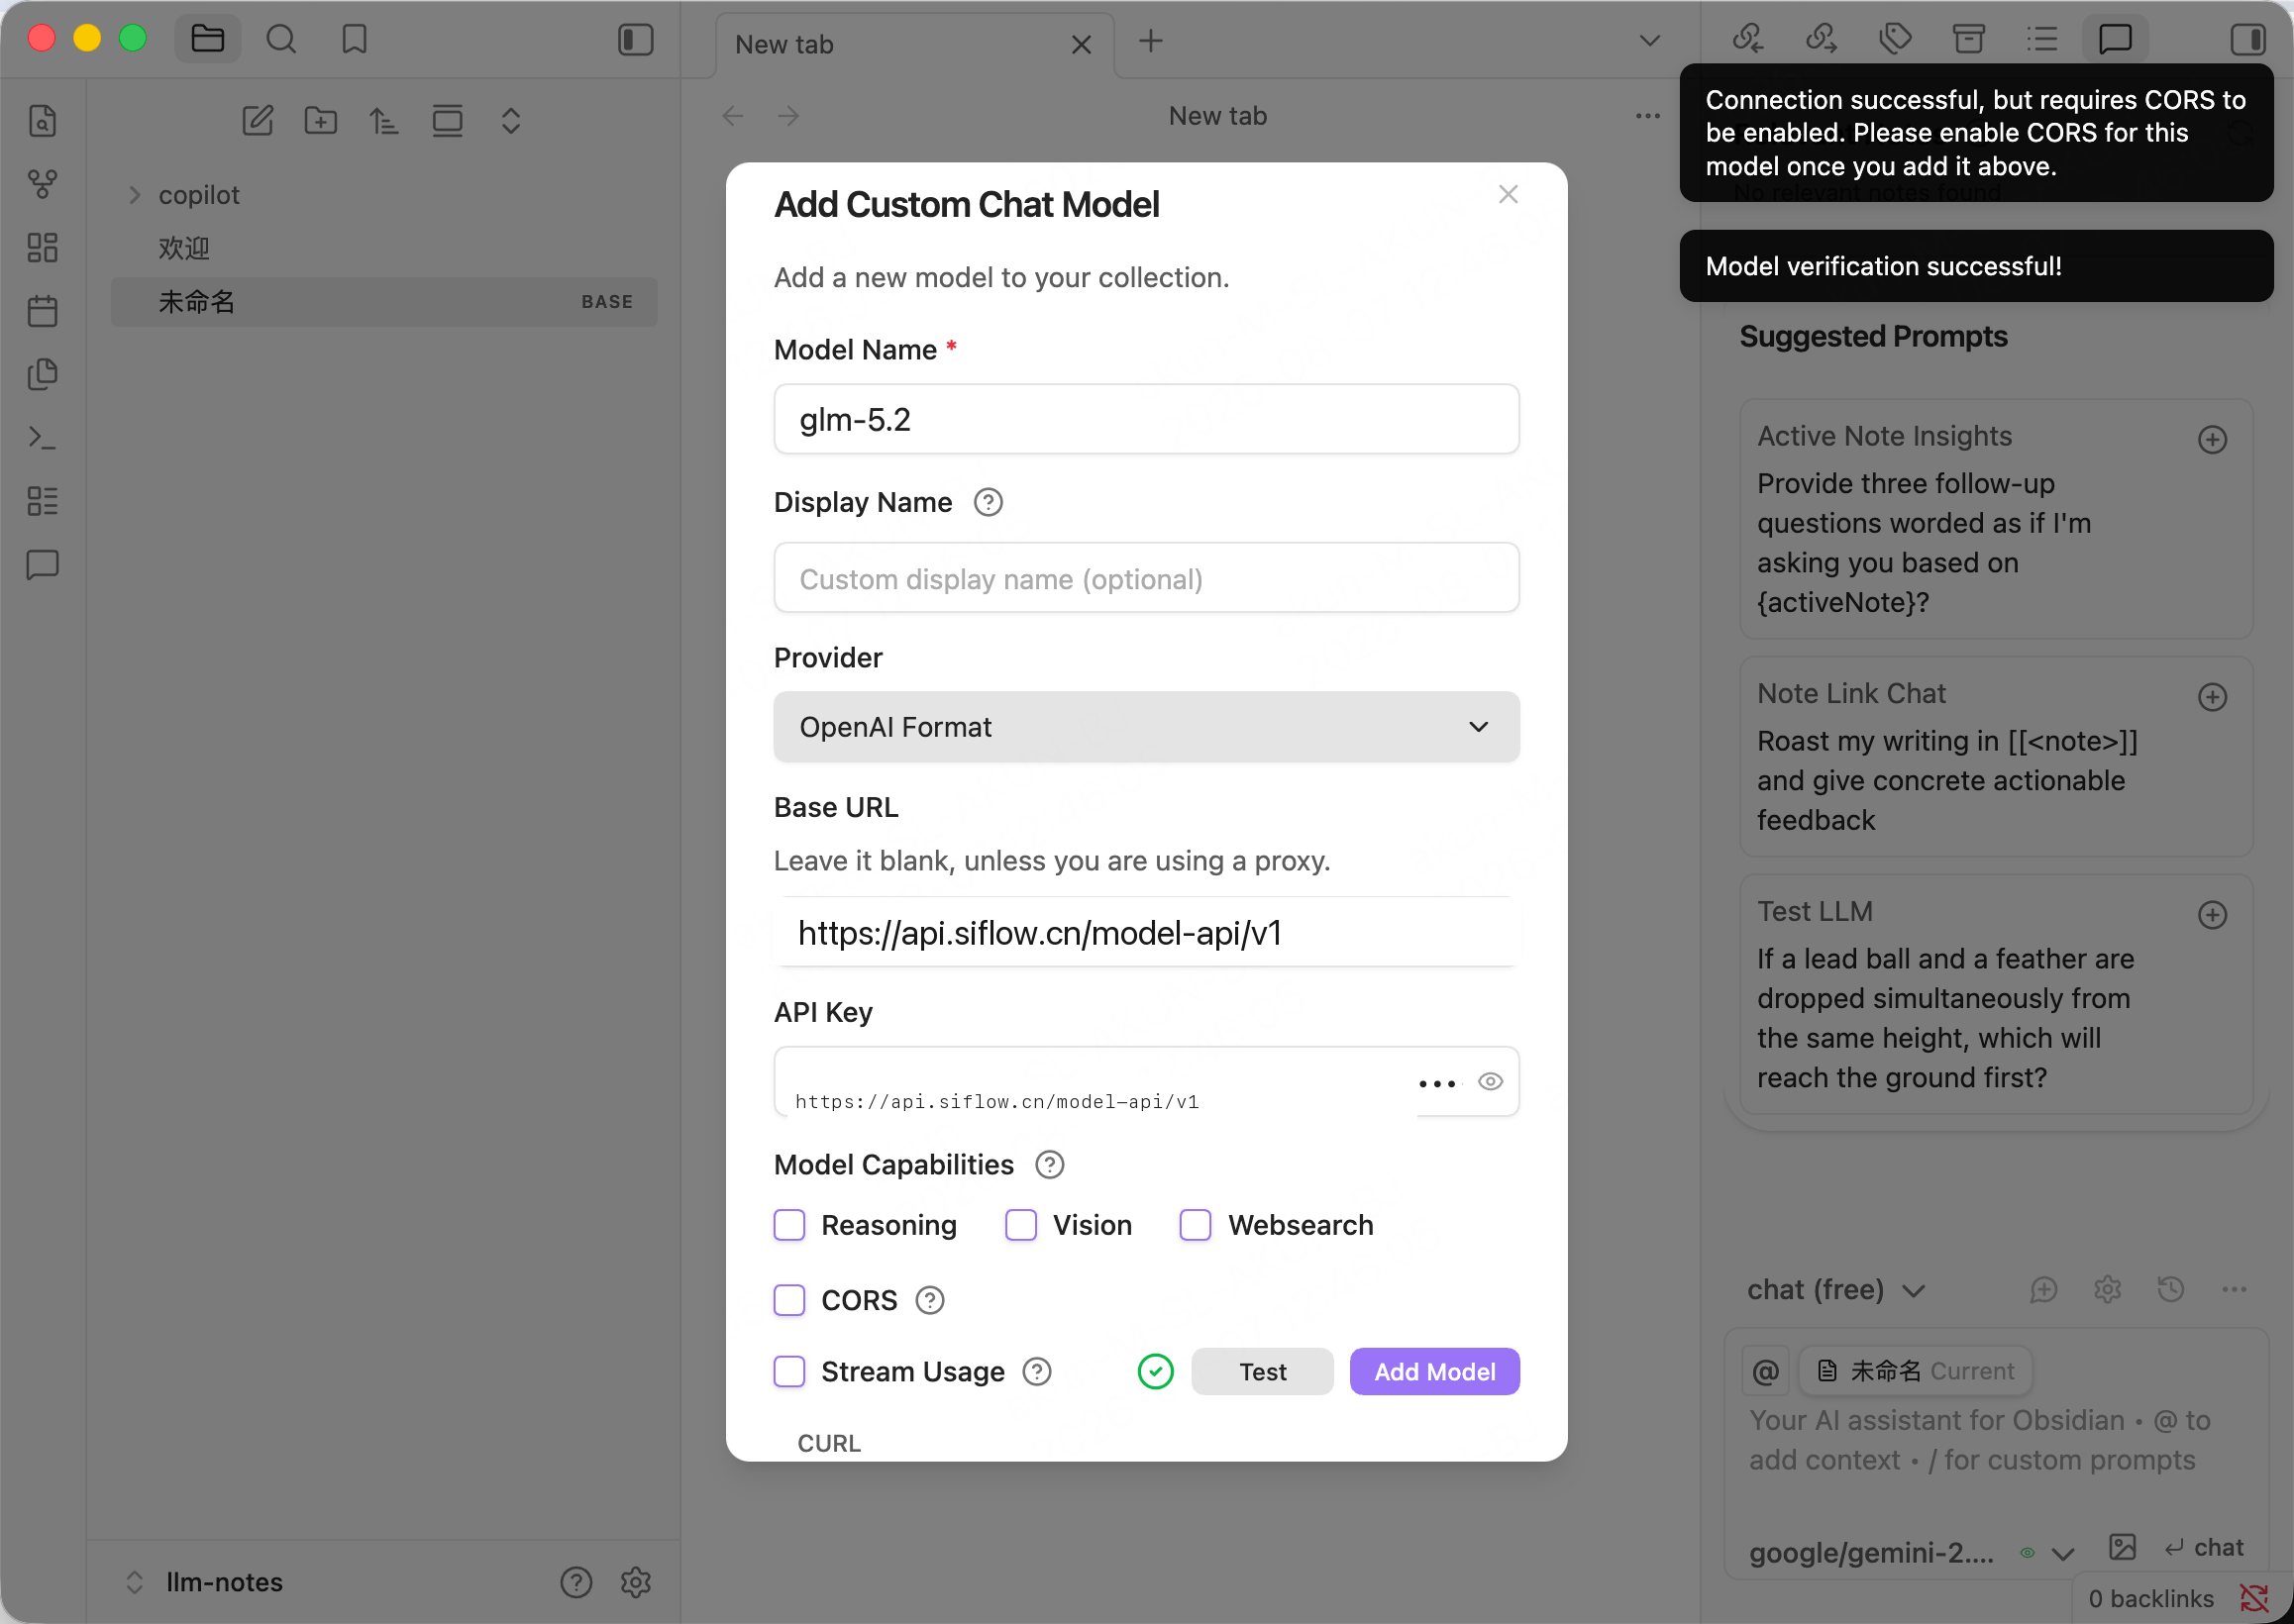
请先在 API 密钥 页面创建 API Key。- 打开 Settings → Copilot → Model,然后单击添加模型。此时会打开 Add Custom Chat Model 弹窗。
-
填写所需字段。
配置时请注意以下事项:
- Provider 必须选择 OpenAI Format。这是 custom OpenAI-compatible endpoint 对应的选项。OpenAI、Anthropic 等具名 providers 会指向它们的官方服务。
- Base URL 字段提示为 “leave it blank unless you are using a proxy”,但对于 siflow 这样的 custom endpoint,必须填写
https://api.siflow.cn/model-api/v1。 - 如果使用依赖 tool calling 的 Copilot 功能,请选择原生支持 tool calling 的模型。
- 在 Model Capabilities 下勾选 CORS。 桌面应用访问 custom endpoint 需要 CORS。否则 Test 按钮会提示 “Connection successful, but requires CORS to be enabled”。
- 单击 Test 验证连接。预期看到 “Model verification successful!”,然后单击 Add Model。
验证
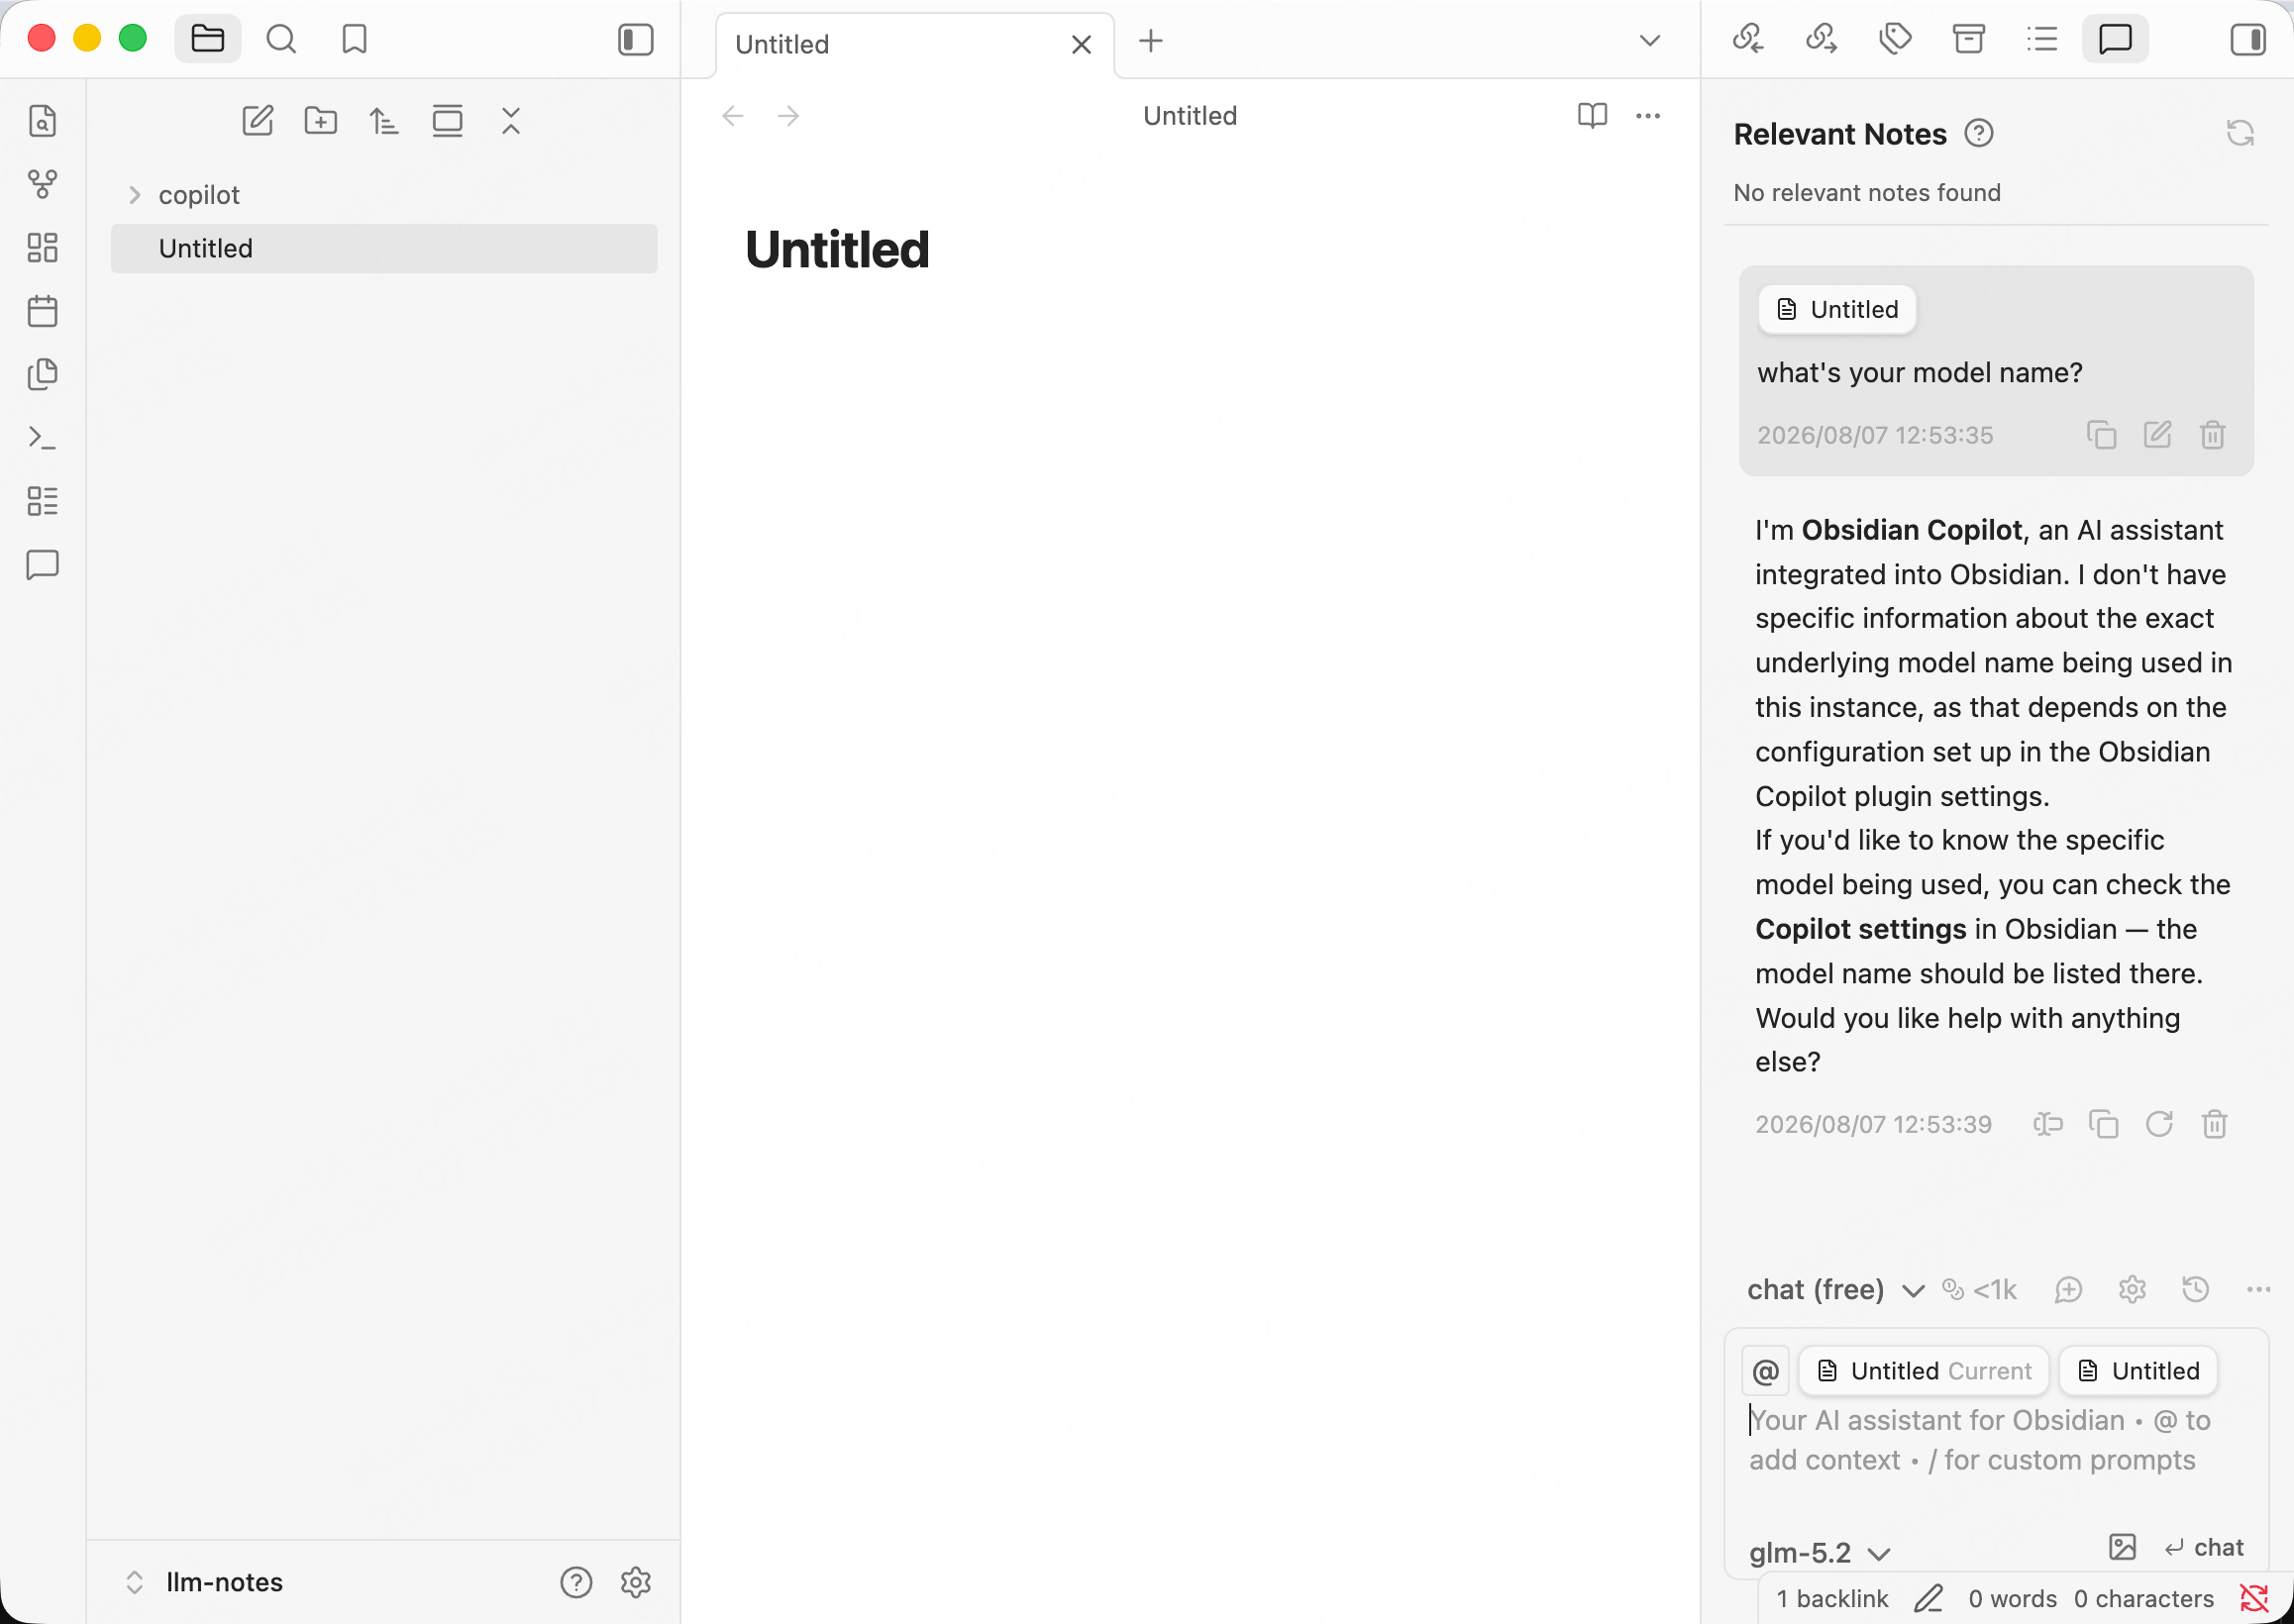
打开 Copilot chat pane,在底部模型选择器中选择glm-5.2,然后发送消息。如果正常回复,即表示连接成功。
Assistant 可能会自称为 “Obsidian Copilot”,而不是底层模型名称。这是 plugin 自身的 system prompt,不是路由问题;模型选择器仍会显示正在使用的算秩模型。